When we purchased Nicole's quilting frame, several years ago, we looked at many available frames. One of the ones we didn't purchase had an accessory tray that we liked. So I told Nicole that I thought I could make one. I finally got around to it.
I intended to paint the MDF blue, then glue the grippy-material to it. But, that would have required masking-off all of the interior dividers plus the time to paint it. Nicole suggested I cut the grippy-material, try it without the paint, and see what it looked like. In the end, I skipped the paint. Nicole liked it, and the grippy-fabric is enough to obscure the layout lines, so I didn't really need to paint it, after all. It took more glue (red Titebond) to hold the grippy-fabric than I expected. I had to glue most of it twice. Initially, I used too little glue and the fabric fell away from the MDF when I held the tray upside-down.
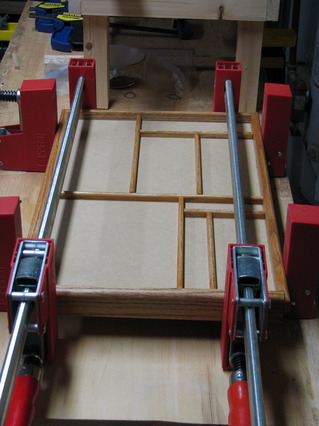
The tray bottom is ¼" MDF. The edges and interior dividers are Red Oak. The MDF is from the same piece I used for the router table, which determined the size of the tray. I decided to attach the edge by rabbeting the pieces. So I started by drawing ¼" width around the perimeter of the MDF. To get the interior compartment-sizes, I asked Nicole to grab a few of the things she'd be putting on the tray. I put them on the MDF and drew rectangles around them.
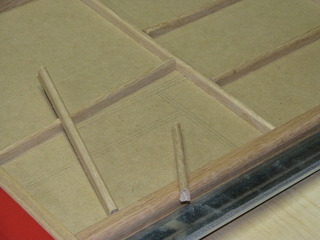
If you look closely, you'll see that I drew the rectangles, then drew secondary lines showing the actual ¼" width of the interior pieces. These lines provided a lay-out guide, and a rough guide to lengths.
The edge pieces are scrap, leftover from the dog ramp. I used the router to round-over the outer corner, and to cut a ¼" rabbet. I purchased ¼" Red Oak for the interior dividers, and rounded them on the router. Then I ripped ½"-thick strips for the interior dividers, and cut them to length.
I wanted to stain the edges and dividers, but paint the MDF. Masking tape won't stop stain. I need bare wood to glue, so staining must be done first. (I originally thought I'd paint the MDF first, then stain the oak in-place.) So I stained the oak (Colonial Maple). And glued it.
I intended to paint the MDF blue, then glue the grippy-material to it. But, that would have required masking-off all of the interior dividers plus the time to paint it. Nicole suggested I cut the grippy-material, try it without the paint, and see what it looked like. In the end, I skipped the paint. Nicole liked it, and the grippy-fabric is enough to obscure the layout lines, so I didn't really need to paint it, after all. It took more glue (red Titebond) to hold the grippy-fabric than I expected. I had to glue most of it twice. Initially, I used too little glue and the fabric fell away from the MDF when I held the tray upside-down.
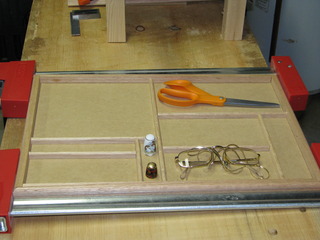
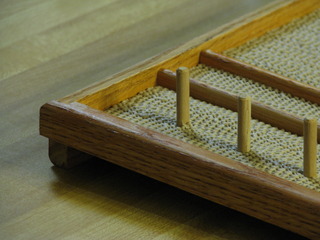
The point of this tray is to hold things while Nicole's working at her quilting frame. The bottom edge of the top edge-piece hangs below the MDF. That allows the tray to hook onto the top rail of the frame. The grippy-fabric and interior dividers keep her tools from falling out, or just piling at the bottom of the tray. (Did I mention the grippy-fabric is left-over, too?)
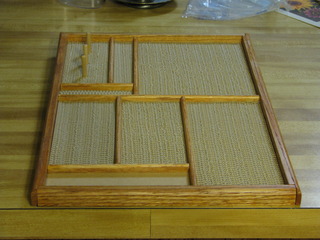
This is the finished product, mostly. The empty space in the lower-left corner is for a pin-cushion. That's fabric-and-stuff, so Nicole's making it, not me.
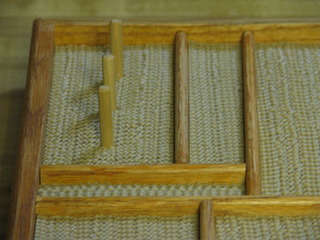
All-in-all, I'm happy with it. I'm not happy with portions of it. Staining is uneven. I could have cut some of the edge pieces better. One of the interior dividers isn't square. The spool-spindles don't line-up because I didn't mark them when I laid-out the rest of the tray. But, for a mostly-scrap project, and an early-attempt at cabinet-grade work, it's OK. It'll work and it doesn't look bad, and, most importantly, Nicole says she's happy with it.
All-in-all, I'm happy with it. I'm not happy with portions of it. Staining is uneven. I could have cut some of the edge pieces better. One of the interior dividers isn't square. The spool-spindles don't line-up because I didn't mark them when I laid-out the rest of the tray. But, for a mostly-scrap project, and an early-attempt at cabinet-grade work, it's OK. It'll work and it doesn't look bad, and, most importantly, Nicole says she's happy with it.